Difference between revisions of "VMS IDE how to"
| Line 27: | Line 27: | ||
[[File:Open_project_2.png|800px|none|none|open project 2]] | [[File:Open_project_2.png|800px|none|none|open project 2]] | ||
| − | + | The selected folder is shown in the '''Explorer''' tab. All project files and directories will be shown in this panel. | |
| + | [[File:Project_is_open.png|400px|none|none|project is open]] | ||
[[Category:VMS IDE]] | [[Category:VMS IDE]] | ||
Revision as of 10:03, 12 April 2021
Contents
[hide]Installing Visual Studio Code
To start working with VMS IDE you need to install Visual Studio Code editor.
- Go to https://code.visualstudio.com/
- Click the download dropdown button and select the build for your platform (Windows, Mac, or Linux). The installer will be downloaded.
- Run the installer and follow the instructions
Installing VMS IDE extension
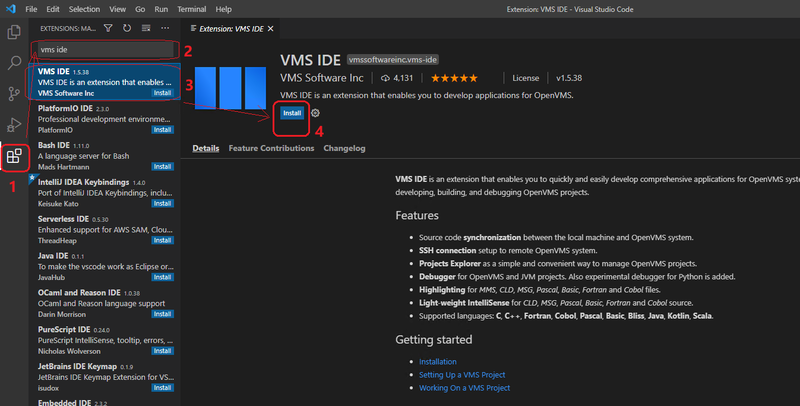
- Select Extensions view in the Activity Bar
- Type “vms ide” into the search box
- Select VMS IDE extension
- Click the Install button in the Extensions view
VS Code will install the extension. To verify that it is installed:
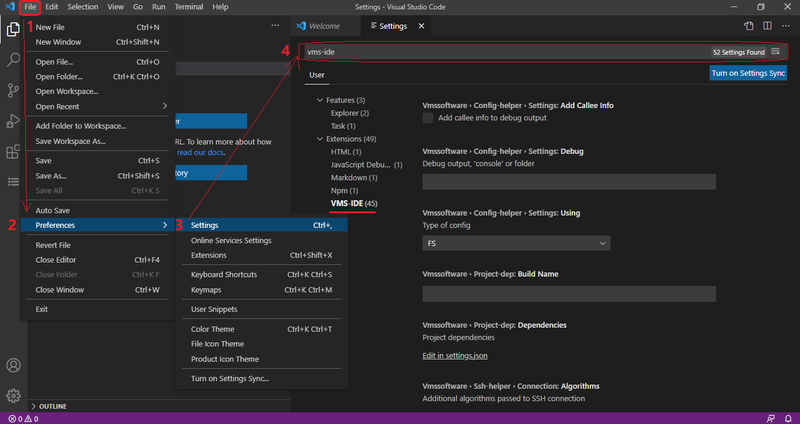
- Go to File → Preferences → Settings
- Type “vms ide” to the Search bar in the Settings tab
The extension will be displayed in the list of settings:
Creating and setting up a project
Creating a project folder
To start working on your project you need to open the folder that will be used as a project folder.
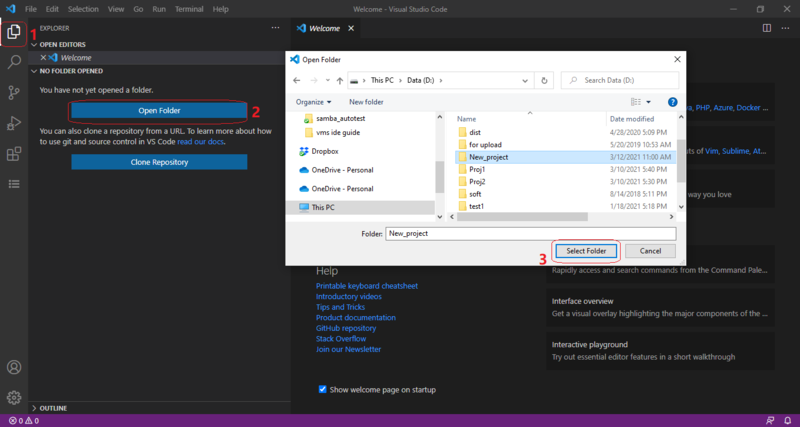
- Select the Explorer view in the Activity bar
- Click the Open Folder button
- Select a folder for the project in the dialog window and click the Select Folder button.
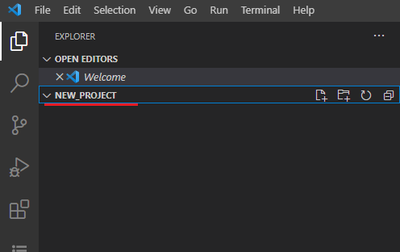
The selected folder is shown in the Explorer tab. All project files and directories will be shown in this panel.


